Adding server to OMD/check_mk
In the last step, the prepared server must be included in the OMD/check_mk web interface.
Log in to the Check_MK Web Interface of the MoniPi
Login to the Webinterface under https://<ip-des-monipi>/default/ with the following credetials:
- User name: omdadmin
- Password: omd
You must ignore the certificate warning (the connection is encrypted with a debian Snake-Oil certificate).

You should then be redirected to the Web interface of Check_MK.
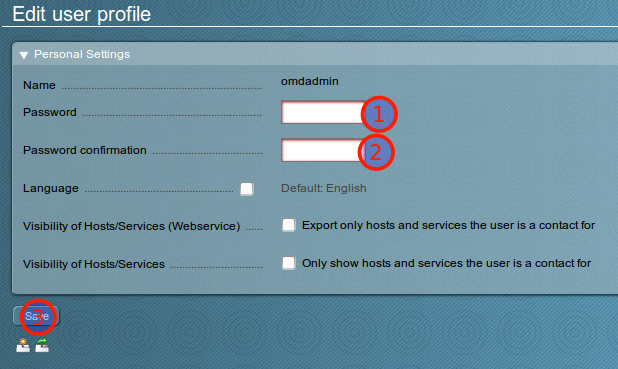
Change the password
Attention
Be sure to first change the password for the administrative user of the Web Interface.
First, click the tool icon in the lower-left corner of the Web Interface.
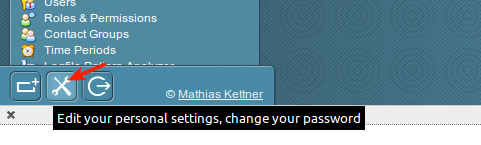
Enter a new password twice in the next screen and accept it by clicking on “Save”.
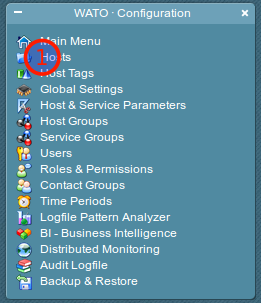
Setup the linuxmuster.net server as another host
Select the “Hosts” area in the “Wato-Configuration” box at the bottom left to get to the host list.
Click on “New Host” to create a new host.
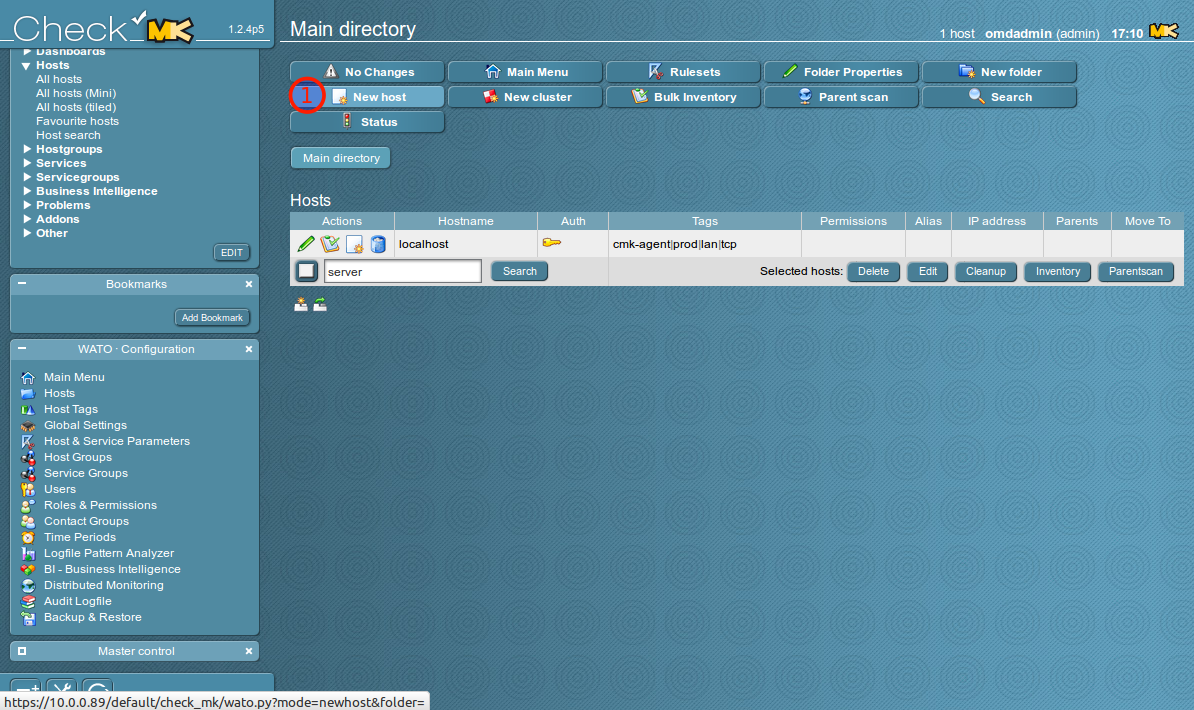
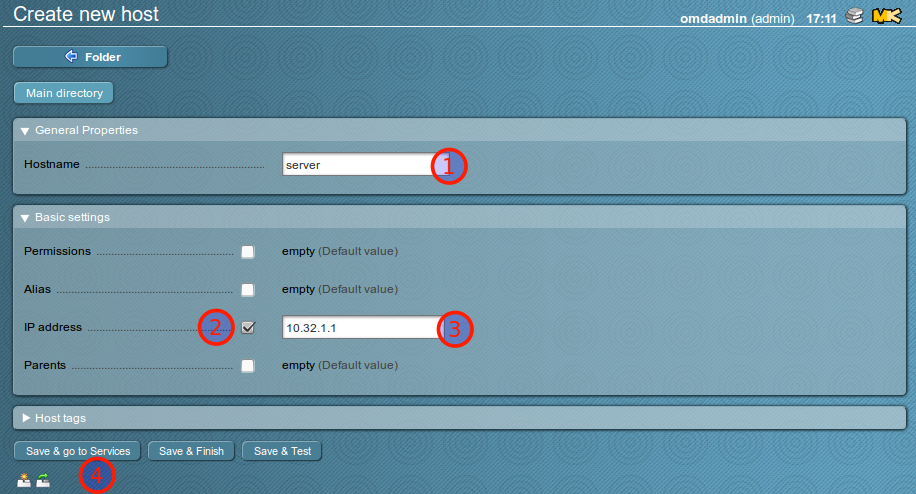
Enter a hostname, which should be checked by the system to be monitored in the Check-MK web interface, check the IP address and enter the IP address of the server. Close the process by clicking Save & go to Service.
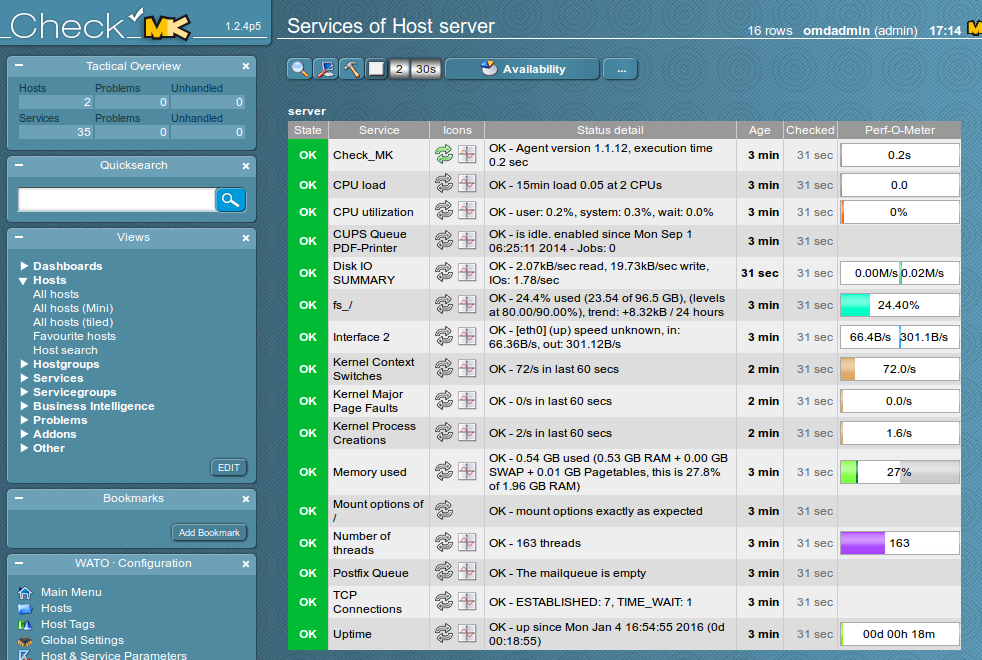
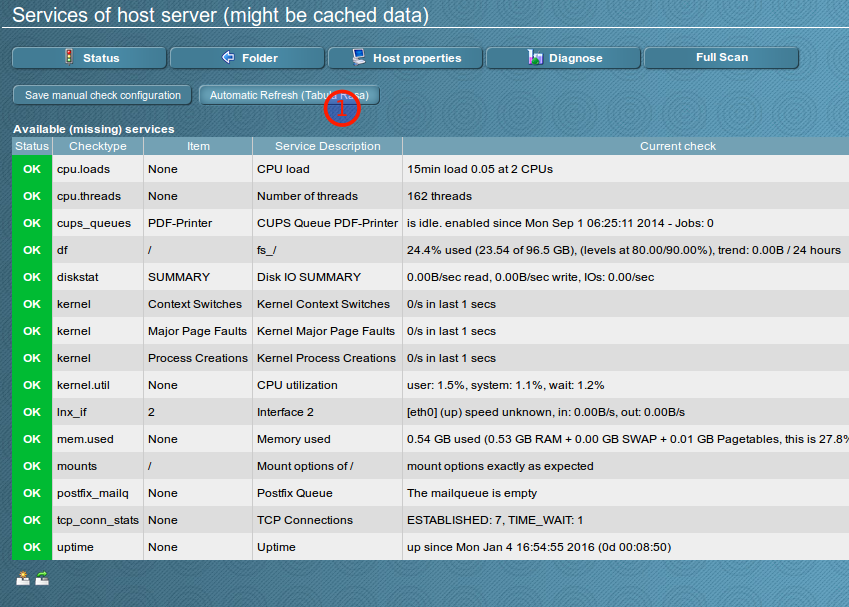
If the server is reachable on port 6556 at the specified IP address, the monitored services of the server that the automatic inventory could find on the server are displayed.
Apply these services by clicking on `` Automatic Refresh (Tabula Rasa) ``.
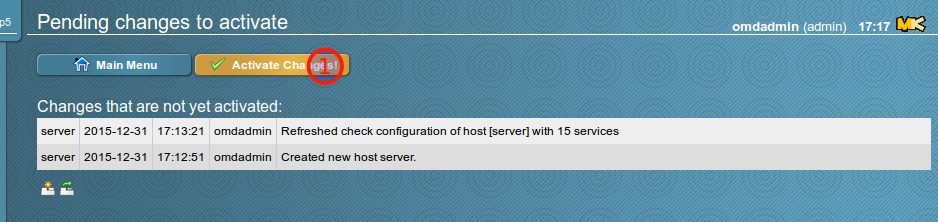
The Web Interface jumps back to the host list and shows in orange that there are unsaved changes. Click on the orange button.

The unsaved changes will be displayed and you will be taken to the system by clicking on Activate Changes.
The changes are accepted.
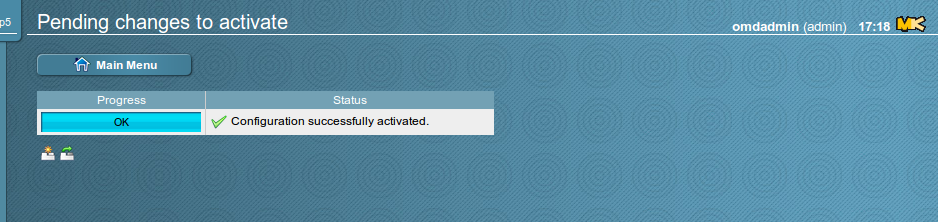
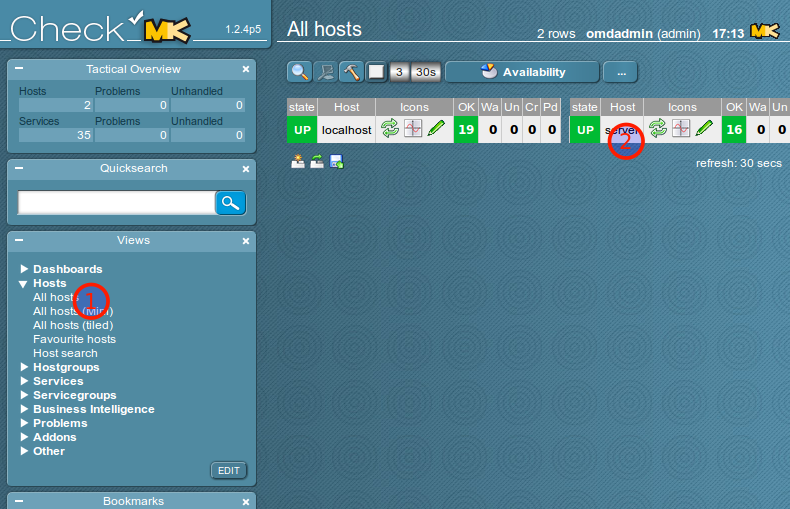
Now the server appears in the host list of the monitored systems, if the you click on Hosts → All Hosts in the Views menu. Clicking on the server name will take you to the overview of the monitored services.